Introduction
Setup Considerations
Part 1
The components that make up Moneris Online
Part 2
What do you need to have to use Moneris Online?
Part 1
Understanding how ecommerce transactions are conducted
Part 2
Understanding chargebacks
Part 3
Introducing how Moneris fraud tools secure transactions and reduce risk
Part 4
Understanding Card Testing
Part 5
Understanding ecommerce fraud risks
Part 6
How to respond to chargebacks and sales draft requests
Part 7
Tips for avoiding major chargeback scenarios
Setting up Moneris Online: Configure Bookmark
Setting up Moneris Online
Configure Bookmark
Follow these steps to login to Bookmark and access the configuration settings:
1. Launch a web browser and go to bookmark.com.
2. Click LOG IN in the top right corner of the screen.
3. Enter your user name and password into the provided fields, then click the LOGIN button.
4. On your main profile page, click YOUR WEBSITE.
5. On the Your Websites page, locate the site you wish to add payments to, then click the Edit button.
Need additional help?
Visit our Support pageFollow the instructions below to configure Bookmark to accept online payments and integrate with Moneris as the payment processor.
1. On the website builder main page, from the menu bar on the left, click SETTINGS.
2. On the SETTINGS menu, click E-COMMERCE.
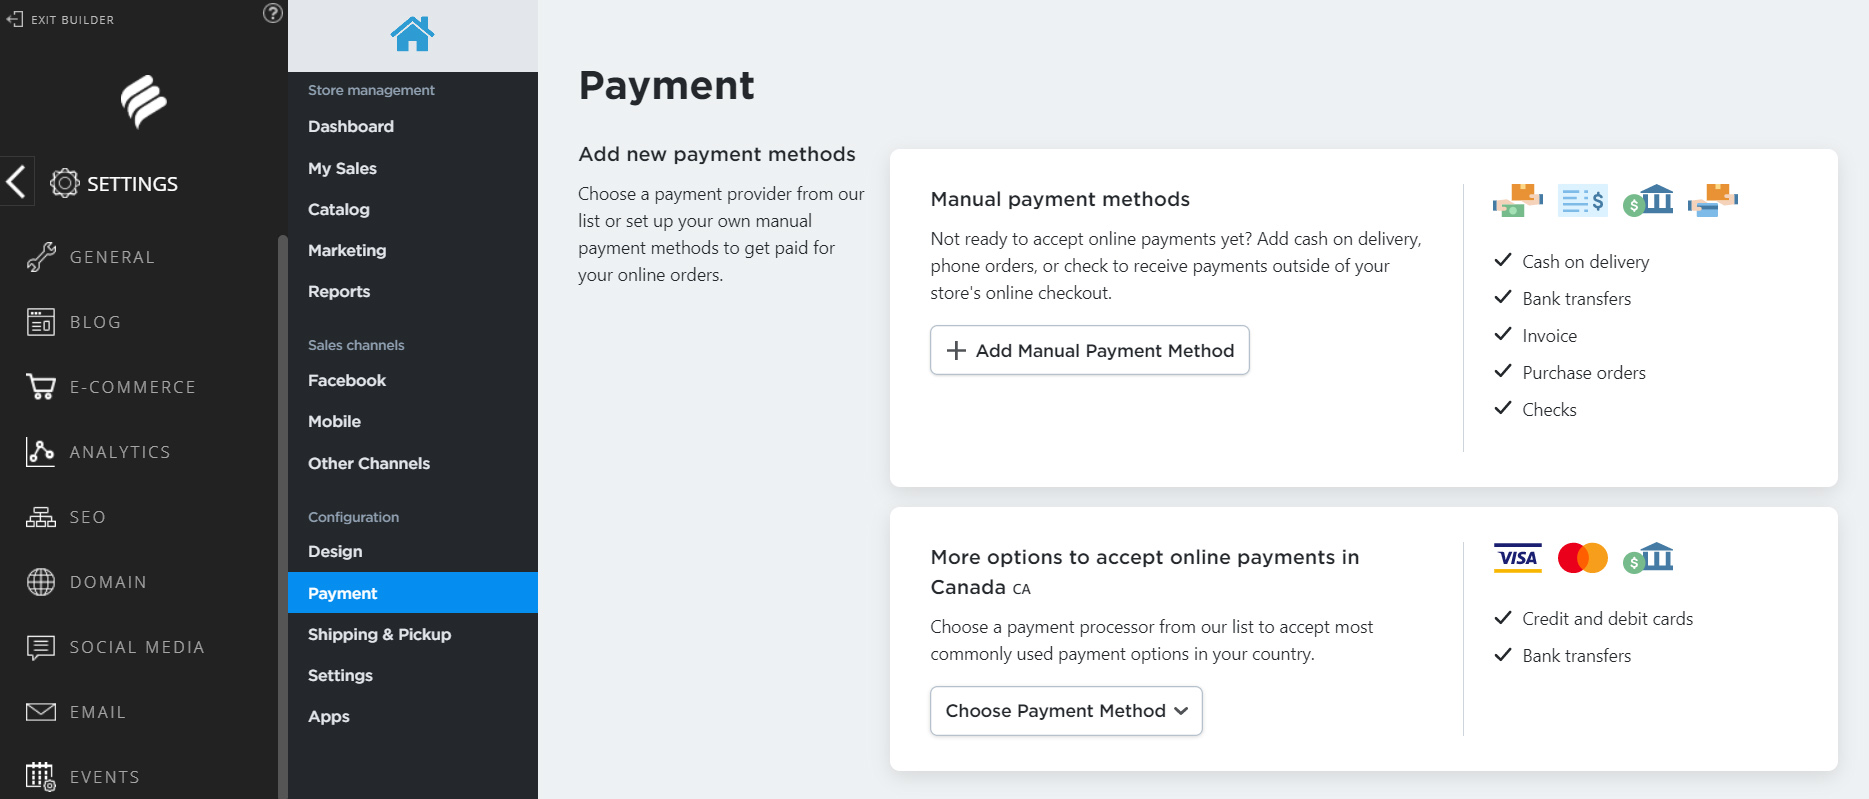
4. In the Payment screen, click inside the More options to accept online payments in Canada section.
5. Click the Choose Payment Method drop-down menu, and select Moneris Checkout. The Moneris Payment account details page appears.
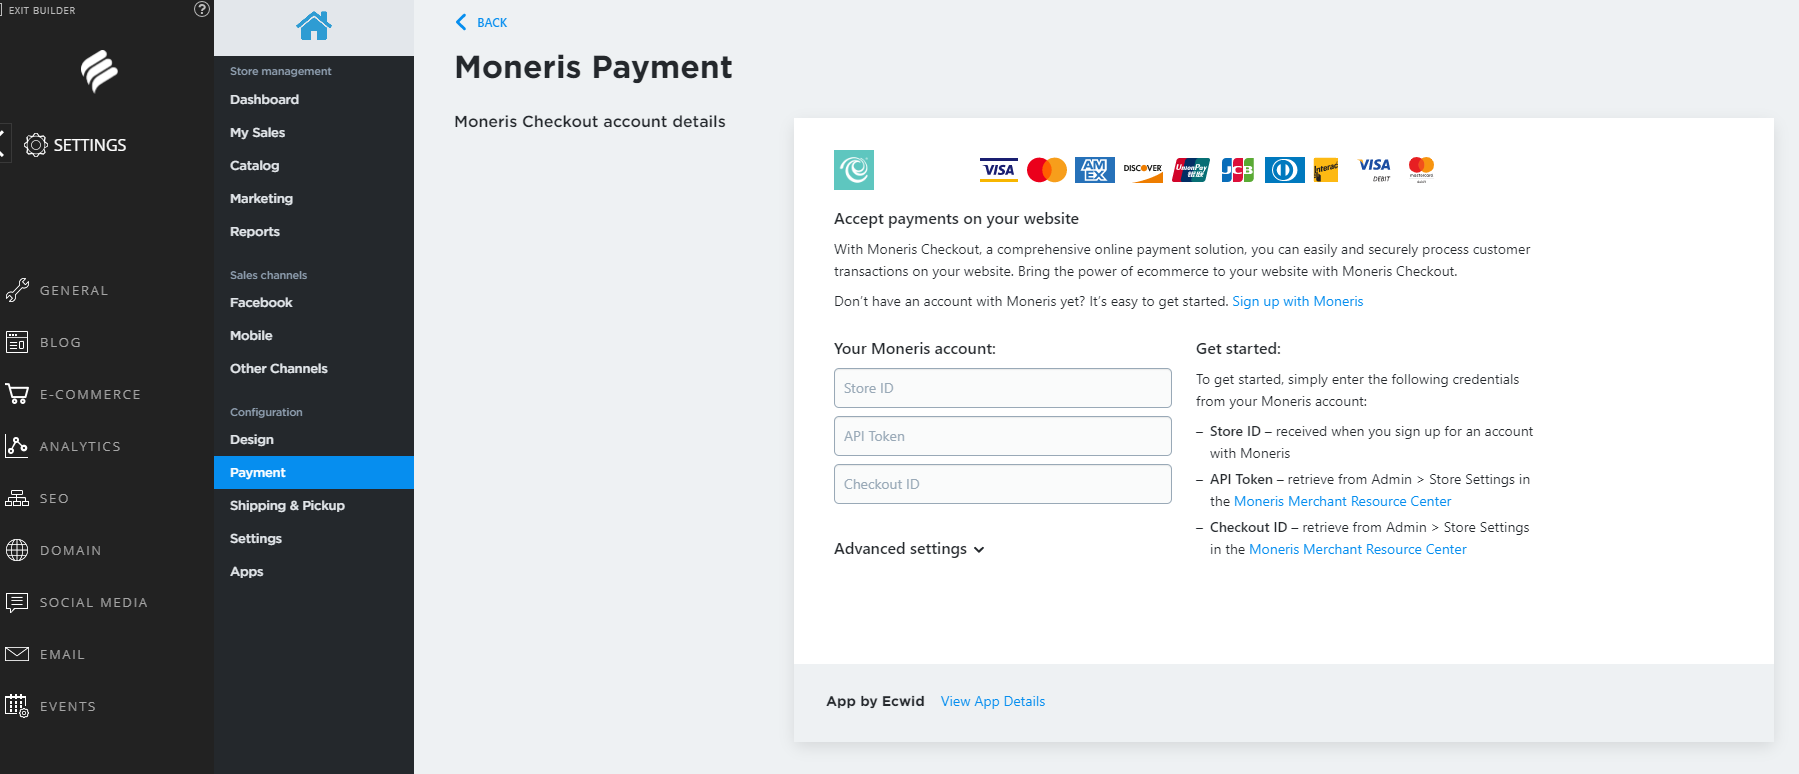
6. In the Moneris Payment account details page, enter your Moneris Checkout account details to link your Bookmark ecommerce site with Moneris Checkout as follows:
a. Click inside the Store ID field and enter your Moneris Checkout store ID that you retrieved from the Welcome email.
b. Click inside the API Token field and enter the API token you recorded earlier.
c. Click inside the Checkout ID field and enter the Moneris Checkout ID you recorded earlier.
7. Scroll down to the Appearance options section, and rename the button that will take your online customers to the Moneris Checkout to process their transaction as follows:
a. Click inside the Payment method name at checkout field and enter a description for this payment method that will appear to your customers during checkout (e.g. “Credit/Debit”). By default, the button name is “Moneris Payment”.
b. Ensure the Enable this payment method at checkout switch is set to “Enabled”.
c. Click the Save button at the top of the screen.
8. Click the < BACK link at the top of the page to save your work and return to the configuration.
Need additional help?
Visit our Support pageNow that you have entered the integration settings, enable Test Mode so you can test the Moneris payment integration with your Bookmark website.
1. In the Moneris Checkout Account Details page, click Advanced settings to expose additional options (if it is not already expanded).
2. Place a checkmark in the Enable test mode checkbox.
3. Click SAVE on the menu bar on the left side of the screen.
Need additional help?
Visit our Support pageNow that Test Mode has been enabled, follow the steps below to conduct a test transaction to ensure ecommerce transactions can be processed on your Bookmark website.
Note: Before conducting test transactions, you need to set up at least one product in Bookmark and assign it a price. Follow instructions provided by Bookmark to create product profiles in their interface.
Note: This is a general guide only. You may have customized button names and other on-screen elements during the design process.
1. In the Bookmark site builder tool, click PREVIEW on the menu on the left side of the screen. A preview of your ecommerce site launches.
2. Click SHOP (or whatever you have named the area in which you are selling merchandise).
3. Click one of the products.
4. Click the Go to Checkout button.
5. Enter the required information e.g. your name, email, shipping address into the fields, then click the Checkout button.
6. Enter your credit card info into the provided fields, then click the Checkout button. The test transaction processes and returns a result.
7. Close the preview and return to the site builder tool.
Need additional help?
Visit our Support pageBefore publishing your website onto the internet (making it public), you need to disable Test Mode to ensure that transactions are processed and money is deposited to your account. Follow the directions below to disable Test Mode.
1. In the Moneris Checkout Account Details page, click Advanced settings to expose additional options (if it is not already expanded).
2. Remove the checkmark in the Enable test mode checkbox.
3. Click SAVE on the menu bar on the left side of the screen.
Need additional help?
Visit our Support page
Congratulations! You’ve completed all the steps to integrate Moneris Checkout and Bookmark. You’re now ready to process ecommerce sales from your website.
Next, let’s learn more about how the Moneris Online fraud tools protect your business, and how to use the Merchant Resource Center to perform administrative tasks.