How Tap to Pay on iPhone works for small businesses
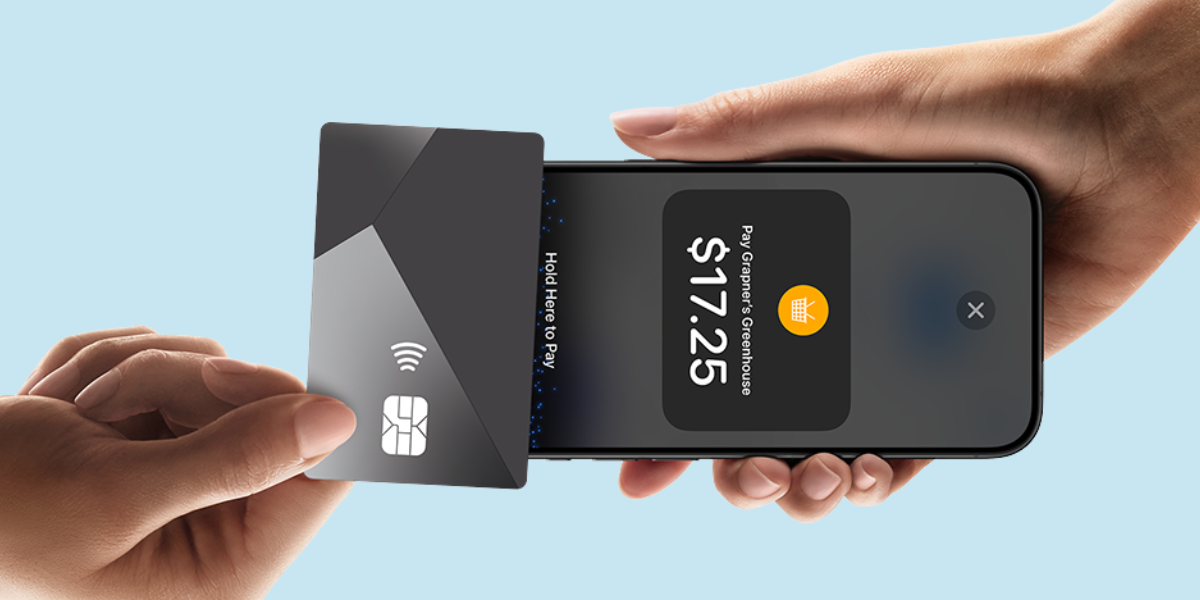
Card tapping on phone

This guide explains how Canadian small businesses can accept contactless payments on iPhone, what to check for Interac Debit and how setting up affects daily use.


Key Takeaways

  1. Tap to Pay on iPhone works best when payment happens away from a fixed counter and staff need a lighter setup.
  2. Interac Debit support is a first check for Canadian businesses because customer payment habits shape daily checkout flow.
  3. Setup quality decides how useful the tool feels, from staff prompts and receipts to battery planning and refund handling.

You can accept contactless payments on a compatible iPhone in Canada without a separate card reader.


That matters if you sell at a market stall, move around a job site or want a lighter checkout setup at the counter. Cash accounted for 10 percent of point-of-sale transactions in the Bank of Canada’s 2023 Methods-of-Payment Survey. If you run a small business in Canada, the useful question goes beyond asking if tapping on a phone works. You need to know whether the setup fits Canadian payment habits, especially for debit, and is simple enough to use on day one. Payments are part of the customer experience here, so it’s better to choose the option that matches how people already pay and how your staff already work.

Tap to Pay on iPhone accepts payments without extra hardware

Tap to Pay on iPhone turns your phone into a contactless checkout. Customers tap a card or wallet on your iPhone. No separate reader is required for the tap itself. If your payment app is set up for Canada, you can take in-person payments anywhere your phone goes.

A flower seller at a Saturday market can key in the amount, turn the phone toward the customer and take payment on the spot. A repair business can do the same at the end of a service call before leaving the customer’s home. That keeps payment close to the moment the work is finished, which often feels more natural for both sides.

You still need the basics around the phone. A compatible device, network access and a charged battery are part of the setup, and receipt delivery needs to be ready before your first shift. A phone-based checkout works best when you want mobility, fewer devices to carry and less countertop clutter during the day.


Canadian merchants should confirm Interac Debit support first

Canadian merchants should check which payment types are supported before anything else. Tap to Pay on iPhone only works as a daily checkout tool when the app accepts the cards your customers already use.


That includes contactless credit, mobile wallets and, for many businesses, Interac Debit.


Debit cards represented 27 percent of Canadian payment transaction volume in 2023. If most of your quick purchases are made with debit, you’ll notice the lack of Interac support right away at checkout. Ask your provider directly about Interac Debit on Tap to Pay on iPhone, rather than assuming all contactless payments are treated the same way.


A coffee stand with low average ticket sizes will notice this sooner than a business that mainly invoices for larger jobs. A hair salon will notice it too when clients pay for a trim and tip with the bank card already in hand. Support for the payment types your customers expect is what turns a neat phone feature into a checkout method you’ll keep using.


Business owner

Tap to Pay on iPhone uses the iPhone NFC reader

The iPhone’s NFC reader handles the tap, then your payment app sends the transaction for authorization. Staff enter the amount on the screen and present the phone. Your customer taps near the device. If a PIN is needed, the prompt appears on the phone during checkout.


A simple store-floor example makes the flow clear. Your staff member enters a $24 sale, turns the phone toward your customer and points to the tap area near the top of the device. Your customer taps a contactless card or wallet, waits for approval and takes a receipt by email or text once the sale is complete.


That sounds simple because it is, but small details still matter. Staff need to know where the tap point is, so they don’t wave the phone around or ask for repeated attempts. Screen brightness matters outdoors, and a sturdy phone case helps staff work comfortably without getting in the way of a quick handoff at checkout.


Setup starts with a payment app on iPhone

Getting started is mostly a software task. You install a supported payment app, sign in with your merchant account and turn on Tap to Pay on iPhone inside the app. Your phone becomes the checkout point once account checks and device requirements are complete.


Moneris Go is one of the early Canadian options for this setup and supports Interac Debit on Tap to Pay on iPhone. That matters because you’ll usually want a short path from app download to first payment, rather than a separate hardware order or another delivery window. Setup tends to feel lighter when the phone you already carry becomes the payment device. That also keeps staff training shorter when you’re starting with a phone you already know.


Keep your first-day checklist tight and practical. Test the full checkout flow before staff use it with customers. Make sure the customer-facing prompts are easy to follow. Confirm receipts work the way you want them to.


  1. Confirm your iPhone meets the app’s device and software requirements.
  2. Download the app and finish merchant account verification before your shift.
  3. Turn on Tap to Pay on iPhone and run a staff test sale.
  4. Check receipt settings so customers get email or text confirmation.
  5. Pack a charger or battery pack for mobile selling days.  

The best use case depends on where you sell

Tap to Pay on iPhone fits businesses that move, queue or serve away from a fixed counter. The best setup depends on where payment happens in your day. If customers pay where the work is done, a phone-based checkout often feels more natural than sending everyone back to one terminal.


A shop that gets busy at lunch can use a phone to shorten the line while keeping the main till free. A patio server can present the bill right at the table. A home service business can close the payment step before leaving the driveway, completing the job in one visit rather than splitting the work and payment into separate steps.


Selling situation

Why Tap to Pay on iPhone fits

What to check before the first shift

You sell at weekend markets or seasonal pop-ups.

You can take payment at the stall without setting up a separate checkout station.

Check mobile data strength before opening and keep a battery pack nearby.


You run home services or on-site repairs.

You can collect payment as soon as the work is done and the customer is present.

Make sure staff know how to send receipts from the phone before they leave.


You need line-busting support in a retail store.

Staff can serve a few waiting customers at a side during a rush.

Confirm that the item entry and receipt steps are quick enough for short purchases.


You serve guests on patios or at temporary counters.

Payment is taken where the guest is already standing or seated, eliminating the need for extra trips.

Test screen brightness and the tap position outdoors before service starts.


You book appointments for services such as salons or clinics.

You can settle the visit right after the appointment instead of walking back to a desk.

Review how taxes, tips and receipts appear in the app before opening day.


Business owner


Security protections apply to every tap transaction

Tap to Pay on iPhone uses built-in security features on the device and within the payment flow. Payment credentials are handled through secure processes rather than plain card storage on the phone. Staff still need good device habits because operational security starts with the way you use the checkout.


A strong device passcode, current software and controlled staff access are the basics. If you hand a work phone to a weekend team member, sign them in only for the shift and remove access when the shift ends. If you use a shared phone at a pop-up, lock it when it is not in active use and keep the app session under staff control.


Security also includes the customer experience. People need to see the amount clearly before they tap, and they should know how a receipt will arrive after approval. Those steps build checkout confidence because the phone does not feel like a workaround. It feels like a normal, well-run payment flow that happens to use the device already in your hand.

Transaction costs should match your average ticket size

The right cost view goes beyond the rate on a single transaction. You need to compare pricing with your average ticket, your sales mix and the value of moving checkout to the point of service. Hardware savings matter too when you are replacing or avoiding extra readers.


A contractor collecting a $1,200 invoice on-site will look at this differently than a kiosk selling $7 snacks. The contractor may care most about finishing payment before leaving the job, while the kiosk owner will watch short transaction flow and payment mix more closely. Both cases still need a clear view of how debit and credit are priced, because the customer mix will shape the true day-to-day cost.


Refund handling matters as much as the sale itself. If you issue returns, test how quickly staff can find a transaction and process the refund from the same phone workflow. A clean checkout setup covers the full payment cycle. It keeps staff steps to a minimum and makes the experience clearer for your customer.

Common setup gaps can slow your first payments

First-day slowdowns usually trace back to setup details. Staff need to know where customers should tap, which payments are accepted and how receipts are sent. Battery life, screen locks and connectivity also shape how smooth your first week feels. Small checks before opening help you settle those details quickly.


A few short tests will catch most issues before customers see them. Run a low-value staff sale, send a receipt, try a debit tap and check the screen prompt for a PIN flow. Repeat the same test in the place you sell, since a bright patio, a basement service call or a market booth can feel different from a back office.


A neat feature becomes a useful checkout tool when the setup is disciplined.


If your provider’s Canadian configuration matches how your customers already pay, Tap to Pay on iPhone settles into daily work quickly. That’s also where Moneris fits for Canadian small businesses, since the same phone-based checkout flow can include Interac Debit alongside credit and wallet taps.

FAQs

Author Profile

Moneris Team

Moneris Team

Moneris is a leading provider of payment processing solutions in Canada. Our blog is your go-to resource for insights into the ever-evolving world of payments. We cover everything from the latest industry trends and technologies to practical advice for businesses of all sizes. Our blog's mission is to spotlight small businesses and provide resources that help them succeed in today's economy. Blog articles are written by members of Moneris' in-house marketing team with support from internal product and industry experts.

Recommended Articles