

What is a Point-of-Sale System? Costs and Features Explained | Understanding POS Systems
A point-of-sale (POS) system is a tool that enables businesses to process sales, track inventory, manage payments and analyze customer transactions.

Investing in an online store can be a valuable addition to your revenue stream. The strength of ecommerce lies in its convenience as potential customers can find your business from anywhere with an internet connection. As more Canadians turn to online shopping, you can get your business in front of shoppers who are currently browsing online.
There is a lot of thought that goes into launching your online store. To make sure you're using your resources carefully, we're breaking down the transition to online business from your brick-and-mortar store. In the first part, we laid the groundwork with some pre-launch preparation by defining your primary audience, picking the top-selling products for your ecommerce store, and figuring out the shipping process for your orders.
With an organized approach to launching your website, you'll set up your online business for long-term, scalable success.
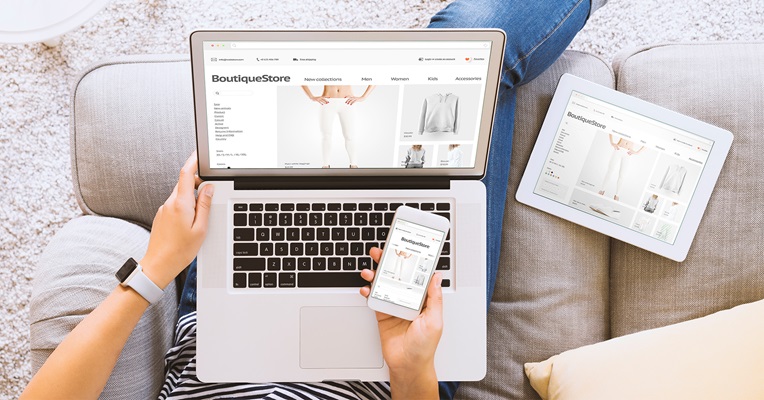
People make purchases because of an emotional connection they feel with a brand, so building an engaging online brand is essential. You don’t get to make a first impression multiple times, so how you present your brand on your website matters—and it matters from day 1. A successful online brand can help you get new customers, while your products and good customer service will retain them.
First, your logo should be easy to recognize and match your current brick-and-mortar store. When it comes to displaying your logo, put it on the upper left corner of the website because that's where most people will look for it. Logo size is also important, so make sure that it's big enough to be noticed immediately by your visitors. To ensure that your customers can quickly get back to your website's main page, link the logo's image to the homepage.
From your store layout to the colour palette and logo, you've already built a brand for your brick-and-mortar store. Your regular customers know what your store is all about, so now you need to ensure that your website matches this narrative. It's essential to fuse brand consistency in your web design to make your business feel engaging and authentic.
Use the same colours, formatting, graphics, fonts, and personality on every page. Your customers should see a uniform design throughout your website. It will also make your site perform better and load faster since you're reusing content.
Everything from colours and fonts to the words and layout represents your brand. However, those design elements don't need to appear cluttered. By incorporating negative space into your website, you give visitors room to breathe visually.
Negative space describes the deliberate blank areas between the various elements on a web page, which allow certain content to take center stage and guide visitors to these places of interest. By adding negative space to key messages, product images, services, and call-to-action buttons, you can increase their emphasis and draw more attention to them.
Clean ecommerce website design is vital for user-friendliness, site speed, and responsiveness. If there are too many images and paragraphs of text, not only will your website be difficult to navigate, it won't be mobile-friendly either. While a minimal design is important, typography and contrast can help to increase readability.
The first thing a visitor will do is scan the content on your website. If they have trouble reading the content, there is a good chance they will leave. There are some things to keep in mind to ensure your website is readable, including:
Aside from website design, product photography is a vital part of a consumer's decision-making process. Since online customers can't have the same sensory experience as in-store shoppers, it's essential to go beyond a simple frontal shot to demonstrate a product's texture, fit, and appearance. Photography not only attests to the quality of your product but also reflects your brand image, creating a lasting first impression.
When building your ecommerce website, you'll need two types of images. The first is the sharp, product-only images on a white background. The other is lifestyle shots that show your product in an intended environment or with other complementing products.
Typically shot on a light-coloured background, product images highlight your product from all relevant angles. These images describe your product visually on your product pages. Mixed in with a couple of lifestyle shots, it can help create an emotional bond with your product and encourage visitors to purchase.
Lifestyle shots, on the other hand, are best suited for social media, blog posts, emails, and homepage because they tell a story. Since they allow a lot more creative freedom, you can take indoor or outdoor shots that suit your brand.
Before getting started, you should make sure you have all the equipment and setup that suits your needs. What equipment do you need to take pictures of your inventory?
Even if you're inexperienced using a camera, you can take great product shots to sell more online. The key is to find a process that suits your needs, so after a while, each step will become more natural. Let's look at our DIY ecommerce product photography tips. Apply them during your next shoot to make your website look more professional.
Set up your background for product shots
Use a white or light background, as it simplifies the entire editing process when retouching your images. You can improvise a backdrop on a budget by creating your light box. It's a box-shaped device with translucent walls that helps distribute the light evenly around your product.

Source: arqspin
Make sure to set your light box on a flat, stable surface with your product in the middle. Use glue dots or tape to fix harder to photograph products in place. Once you get the lighting right, you're almost ready to start shooting.
Find the right lighting for your shots
Setting up the lighting can be tedious, but when done right, it results in beautiful and high-quality images. If you're on a budget, it's best to use natural light. For small in-house product shoots, start by placing your table and backdrop near a large window that allows lots of light. It's always best to shoot when the day is brightest, but try not to shoot under direct sunlight as it can create harsh shadows. You can minimize the light and diffuse it by placing white tissue paper over the window.
If using natural light isn't possible, you have to use artificial lighting for your photo shoots. If you made your light box, you could buy cheap table lamps with cool white bulbs. Set up the lamps on either side of the light box, manipulating the angles and the distance until you get soft, even shadows around your products. Artificial lighting gives you more control over the entire process, especially if you are shooting multiple products over several hours.
Using the right camera and tripod for your shoots
You don't need to invest in an expensive camera to take great pictures. Smartphone camera technology has come a long way over the years. As long as you have your background and lighting set up correctly, you can take high-quality product photos with your smartphone. You may want to invest in a smartphone stabilizer or tripod to bring consistency and stability to your photos. It's easy to end up with blurry and inconsistent images when you're holding the camera in your hands.
Edit your images for a polished look
Retouching your images after the shoot can be the difference between mediocre and professional results. When you're first starting with product photography, getting the background or the lighting right takes a bit of trial and error. Luckily, there are many free image-editing tools available for your smartphone that covers anything from background removal to colour correction, with prebuilt filters. Here are some free photo editing tools you can use on your laptop or smartphone:
Optimize your images to increase performance
If your ecommerce site takes too long to load, it can hurt your bottom line! To increase your website performance, optimize your images to maintain the best quality but without reducing page load speed. There are plenty of free image optimization tools available online to compress your photos before you upload them on your website.
Finally, name your images correctly when you save them on your computer by including relevant keywords. For example, if you're selling a blue t-shirt with a red heart on it, you should name your image file as blue-tshirt-red-heart.jpg. This additional detail helps Google understand the content in the image, thus boosting organic traffic.
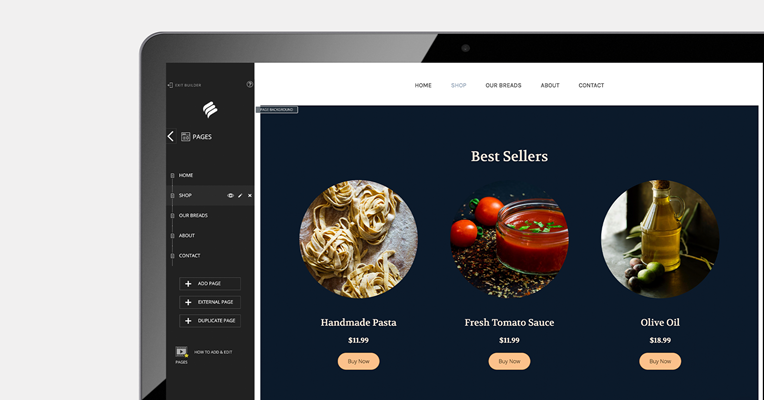
From your branding to the website layout, many aspects create a good user experience when building a website. However, ease of navigation is a key factor. Clear navigation can help visitors find the information they need quickly.
Before you delve right into planning the navigation, consider the pages you want to build on your website. Regardless of your industry, your website must tell a compelling story of who you are, what you offer, and how your customers can get in touch with you. At the very least, you should consider adding the following pages on your website:
The next step is to prioritize all of your pages. When deciding on the hierarchy, consider what information would be of interest to your visitors and where you want to lead them on your website. If you want visitors to end up on your ecommerce store, prioritize the 'Shop' page of your website and add it to your website's main menu.
If you're not sure where to start, consider building a tree diagram or a 'site map' of your website's flow to visualize the structure of your site. A site map is a list of all the main pages of your website and the sub-categories within those pages, clearly indicating which pages are more important. Your site map will form the base of your navigation menu.
There are two types of menus on a website—the main menu and a footer. The main menu appears throughout your website and links to all of the essential pages. On the other hand, the footer appears at the bottom of each page and displays contact information, store policies, and frequently asked questions. Make sure you don't exceed beyond five or six categories for your main menu. With a minimal menu, visitors will be able to process the information better and reach their desired pages faster.
A product description is the marketing copy that provides customers with details about the product features, problems it solves and why it's worth purchasing—all to help generate a sale. Providing vital information is critical if you want the shopper to click "Add to Cart," but what should your product description say? To help you out, here are some tips on how to write product details for your online store:
In the first part of our series, the prelaunch preparation for your ecommerce website, we discussed the importance of determining your primary customers and creating a customer profile. Your products are made for real people to help solve a problem or provide them with a specific function. Your job is to respond to their needs! When you’re writing descriptions, talk to your audience directly by helping them visualize how your product fits into their lifestyle. A good product description shouldn't just tell customers what the product is, but why they need it.
Provide your visitors with details such as dimensions, materials and instructions, so they know what to expect when they receive their order. Don’t forget to mention what is included in the purchase and if they need additional materials to assemble your product. Consider answering the following questions in your descriptions:
Search Engine Optimization, or SEO, is such a daunting topic to the newcomer, but it is an important aspect of your online presence. It's the practice of enhancing your website to rank higher on search engine results pages. Why does that matter? By ranking higher on the search result pages, your business will get more exposure, which leads to more visitors shopping on your website.
When it comes to ranking organically on the first page of Google Search, you're going to have to play the long game. There are three primary categories:
On-page SEO refers to everything you can do on your website to help you rank, whereas off-page SEO refers to the actions you take on other websites and channels to help boost your site’s ranking. Lastly, technical SEO relates to optimizing your website structure to help search engine index your website more effectively.
Now that you have a basic understanding of the different SEO tactics, let’s get into how to increase your rank. If you’re short on time, here’s a simple SEO checklist you can follow as well.
The goal of on-page SEO is to help Google match your website to what your target audience is searching for online. If Google can’t easily understand your website, it’s less likely to display it.
Before you can begin optimizing, you need to choose keywords that match your business. These are the phrases that your customers are using when looking for particular products. Now that you understand what to look for when targeting keywords, you’re probably asking, “how do I use it to get more traffic?” The answer to your question is creating a content marketing strategy.
What is content marketing?
Content marketing involves creating valuable and relevant content to attract a targeted audience and motivate them to buy your products. Rather than promoting your brand, it establishes your credibility and helps you gain consumer trust—and trust builds sales.
Create valuable content for your business
You’re probably familiar with blogs and social media, but they are many different types of content you can create as part of your strategy, including:
You don’t need to create all these different content types right from the start. Start by creating a blog and a social media strategy to build your foundation, and then branch out into other formats. Remember that for your blog posts to rank high, you have to write them with specific keywords.
Build a content marketing calendar
As you start creating more and more content, you might find it’s hard to keep track of everything. To ensure your content strategy is organized, create a monthly editorial calendar for your blog and social media channels.
You can quickly build a template using Excel—assign a column for the publishing date, one for the topic and title, and one for the publishing channel. Not only will you see the bigger picture, but it will also ensure that you’re publishing a variety of content and topics.
By creating strategic, optimized content that resonates deeply with your audience, you’ll be able to drive high-quality traffic to your website and obtain happy customers.
Off-page SEO refers to building your website’s influence outside of what you’re doing on your website to generate traffic. It includes writing guest posts for other blogs, interacting in a forum, or even getting reviews on Google My Business. In a nutshell, off-page SEO simply tells search engines what others think about your website, so a large percentage of it will come from building backlinks.
What are backlinks?
Backlinks are a simple hyperlink that connects other websites to yours. These links tell search engines that your website is relevant to others, which increase your credibility as a brand and give your website a higher rank.
Not all backlinks are equal—search engines give higher weight to links coming from reliable and popular websites. Backlinks can harm your credibility if they are not from sites related to your industry. If you want your website to grow and prosper, you'll need to put together a strategy for building useful backlinks.
What is technical SEO?
Aside from the on-page and off-page SEO, you also need to pay attention to the following:
The information in this article is provided solely for informational purposes and is not intended to be legal, business or other professional advice or an endorsement of any of the websites or services listed.
A point-of-sale (POS) system is a tool that enables businesses to process sales, track inventory, manage payments and analyze customer transactions.

Contactless payment for restaurants offers speed, security and convenience. Learn how tap-to-pay technology improves efficiency and enhances the dining experience.

Learn how to choose the best POS system for your small business. Explore essential features and tips for payment processing and inventory management.

Learn how to process payments online with this comprehensive guide for Canadian businesses. Explore secure, efficient payment processing solutions, and gain insights into integrating and optimizing payment systems to meet customer needs.