- Sign in to your Moneris Go app.
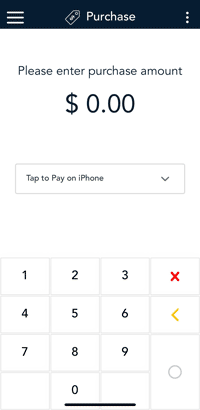
- Start at the Purchase screen as usual.
If your Moneris Go app is on a different screen, tap the Main menu  icon on the top left side of the screen, then tap Transactions.
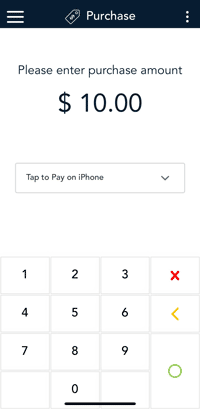
- Tap the Tap to Pay on iPhone dropdown to display the payment options.
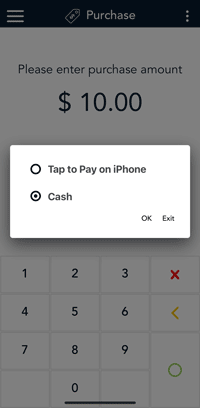
- Tap Cash, then tap OK.
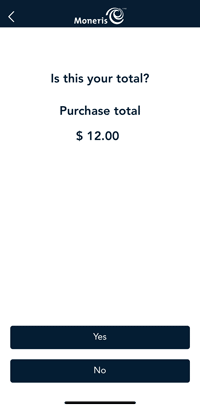
- Enter the purchase amount, then tap the OK ◯.
Note: You can also enter the purchase amount first, then select the payment option.
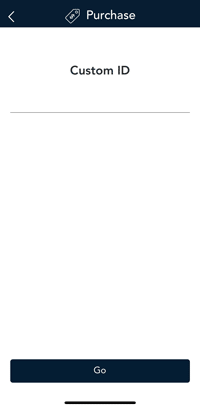
- If the Custom ID screen appears, enter your Custom ID and password to continue. This step appears when password protection for cash transactions is enabled in your user role.
- Tap Go to continue.
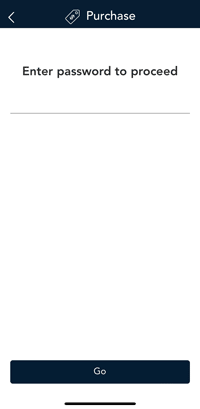
- The password screen appears. Enter your password to continue with the cash purchase. This appears when password protection for cash transactions is enabled in your User role.
Note: If an incorrect password is entered in the Password field, an error will display in red when user clicks "Go". A prompt will appear to re-enter the correct password.
- Tap Go to continue.
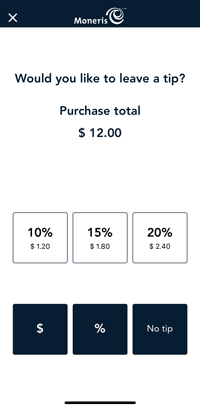
- The screen will automatically change to the tip screen.
Note: If you have Tip enabled, the customer will proceed through the tip options.
- Present your iPhone towards the customer to enter tip or no tip.
- If tip entry is enabled, the customer enters a tip confirmed by tapping Yes.
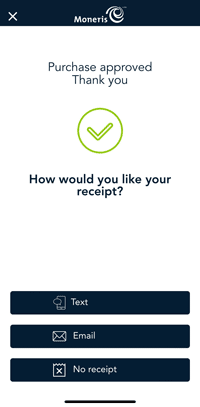
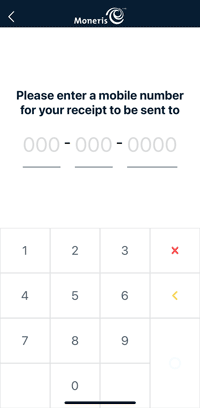
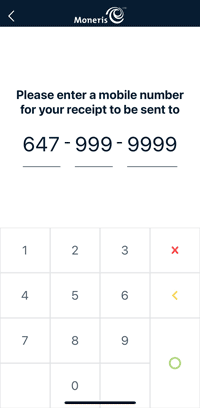
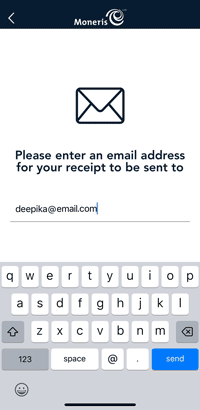
- Once the purchase is approved, the “How would you like your receipt?” prompt appears, showing the customer the available options for receiving a receipt: Text, Email and No Receipt. Otherwise continue to step 15.
Note: You can choose which receipt options customers will see. Refer to Receipt settings.
- When the “Transaction complete” screen appears, tap OK to return to the default transaction screen.