Follow the steps below to configure the checkout to use Moneris for the complete set of online payment forms or to use Moneris only for payment processing.
Important! To integrate Moneris Checkout into your ecommerce solution, you need to create and configure your Moneris Checkout profile in conjunction with developing your ecommerce solution according to Moneris' integration specifications as outlined in How to get started.
Ensure the checkout profile that you want to configure is open on your screen.
Note: To reopen an existing profile, see Reopening a Moneris Checkout profile. To create a new profile, see Creating a Moneris Checkout profile.
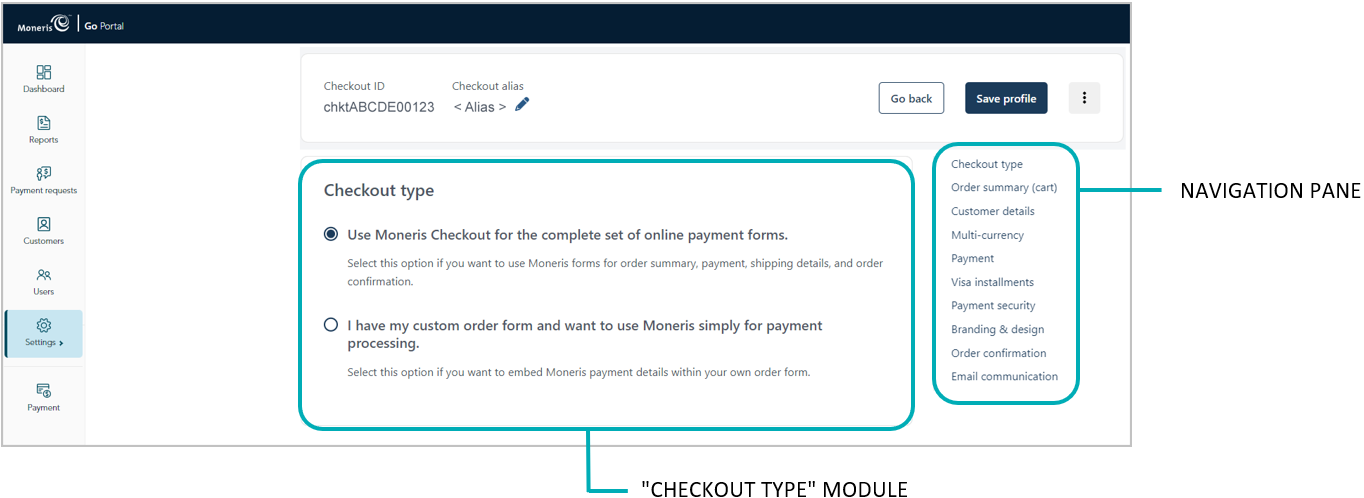
While the profile is open in your configurator, click on Checkout type in the navigation pane to jump to the "Checkout type" module (shown below).
Select the checkout type for your integration:
To use Moneris for all order processes, select the Use Moneris for the complete set of online payment forms radio button.
To use your own custom order form, select the I have my custom order form and want to use Moneris simply for payment processing radio button.
Save the profile's new configuration:
a. Click on the Save profile button.
b. When the "Successfully updated the profile" response displays, the operation is complete:
To preview a full-screen version of the checkout, see Previewing the checkout.
To configure other profile settings, see List of Moneris Checkout features/settings.
To exit the MCO configurator, click on the Go back button (unsaved changes will be discarded).