Follow the steps below to register a new domain to support Apple Pay acceptance in the checkout.
Ensure the checkout profile that you want to configure is open on your screen and Apple Pay acceptance is enabled in the checkout (see Enabling Apple Pay in the checkout).
When the "Apple Pay enablement" window displays (shown below), click on the Add a new domain button.
Note: Any newly added or currently registered domain(s) will be listed in this window.
![]()
When the window refreshes to display the "Registered domains" statement (shown below), do the following:
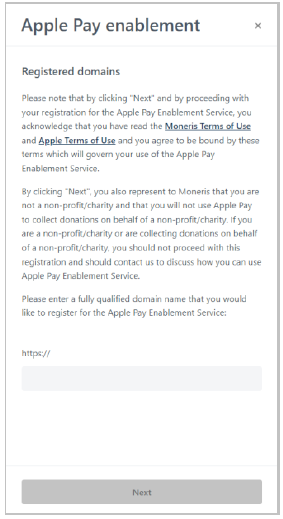
a. Read the terms of service.
b. In the http// field, enter the domain address that you want to register (include "www" in the address), and click on the Next button.
When the window refreshes to display the "Download" button and domain address (shown below), do the following:
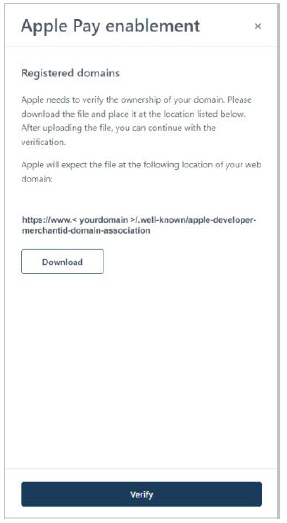
a. Click on the Download button.
Note: This action will initiate the download of a file to your computer.
b. Ensure that you place the file in the location for your Website that matches the domain address shown in the window.
Note: This action will allow Apple to validate your domain.
c. Click on the Verify button.
When the refreshed "Apple Pay enablement" window (shown below) lists your domain(s), do one of the following:
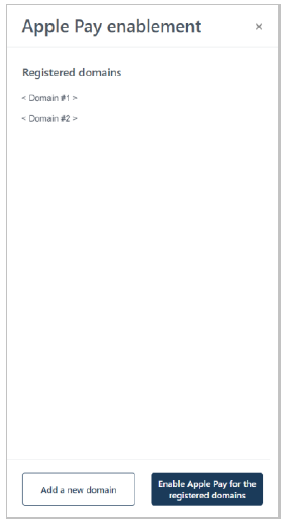
To add another domain, go back to step 2.
To register the currently added domain(s), proceed to step 6.
Click on the Enable Apple Pay for the registered domains button.
Save the profile's new configuration:
a. Click on the Save profile button.
b. When the "Successfully updated the profile" response displays, the operation is complete:
To preview a full-screen version of the checkout, see Previewing the checkout.
To configure other profile settings, see List of Moneris Checkout features/settings.
To exit the MCO configurator, click on the Go back button (unsaved changes will be discarded).