Record petty cash expenses
You can use the Petty cash screen in the portal to account for daily expenses where you have needed to pay for something from your petty cash fund. This can be used for expenses like paying for stationery, or perhaps buying a round of coffee for the
morning shift, or covering parking fees for an employee.
Recording your petty cash expenses in the portal is a two-step process: 1. Start your session 2. Add your expenses.
Start the session
Follow the instructions below to start a petty cash session.
- On the portal’s main menu, click Petty cash.
- In the Petty cash screen, under the Expenses tab, click the Start session button on the right side of the screen. The Start session side panel appears.
- Ensure the Date field shows today’s date. If recording a petty cash expense from a previous date, click the drop-down menu and use the calendar to select a different date.
- Click inside the Opening balance field and enter in the amount that your petty cash fund is opening with today.
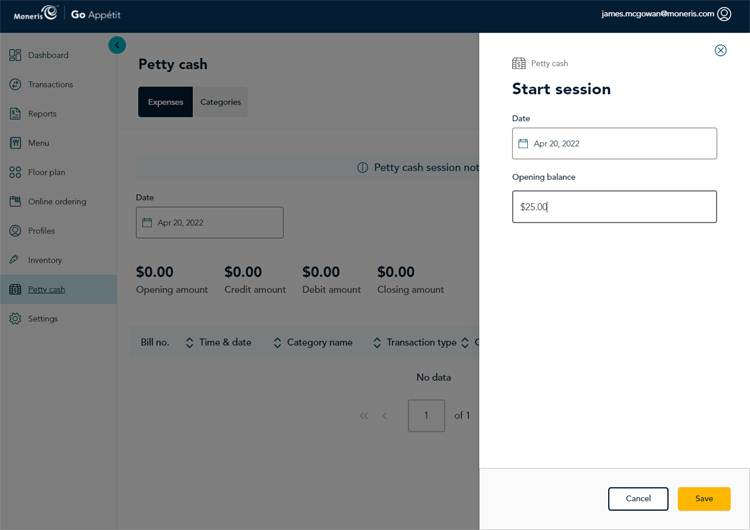
- Click the Save button in the bottom right corner of the panel.
Add your expenses
Follow the instructions below to account for expenses that were paid for from the petty cash fund.
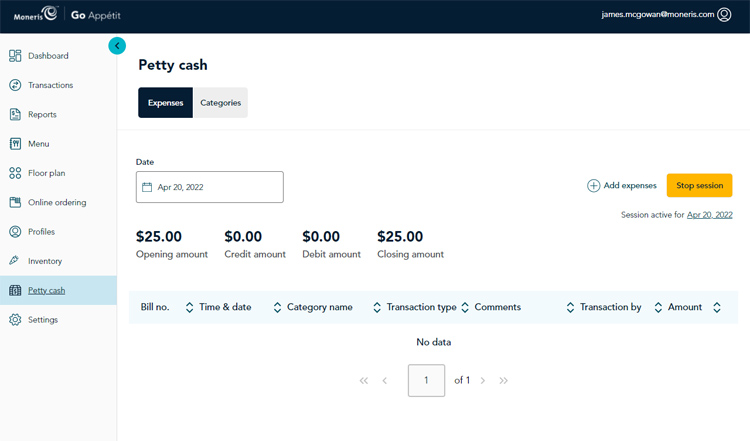
- In the Petty cash screen, click Add expenses. The Adding an expense side panel appears.
- Click the Expense category drop-down menu and select the type of expense incurred.
- Click the Transaction type drop-down menu and select Debit.
- Click inside the Note field and enter some information about this expense.
- Click inside the Total amount field and enter the total amount paid plus tax.
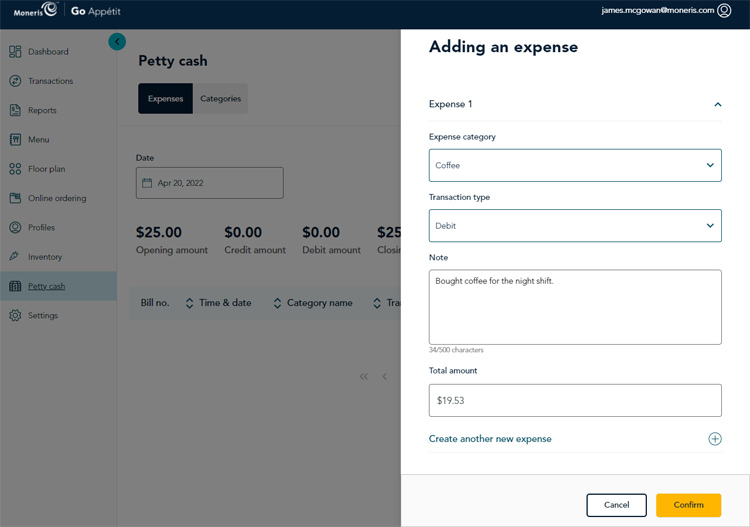
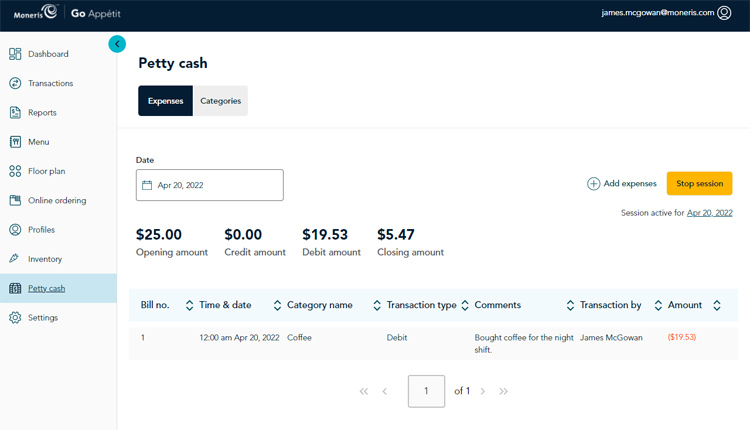
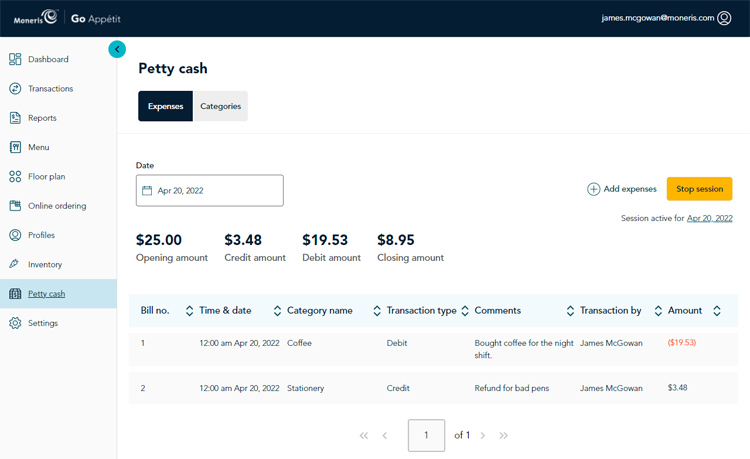
- Click the Confirm button at the bottom of the side panel. The expense is recorded and the Petty cash screen appears with the expense listed.
Add funds to petty cash
In the event that you need to add additional money to the petty cash fund, or you got a refund on a purchase paid with petty cash, follow these instructions to add funds back into petty cash.
- In the Petty cash screen, click Add expenses. The Adding an expense side panel appears.
- Click the Expense category drop-down menu and select the type of expense incurred.
- Click the Transaction type drop-down menu and select Credit.
- Click inside the Note field and enter some information about this expense.
- Click inside the Total amount field and enter the total amount (plus tax if applicable).
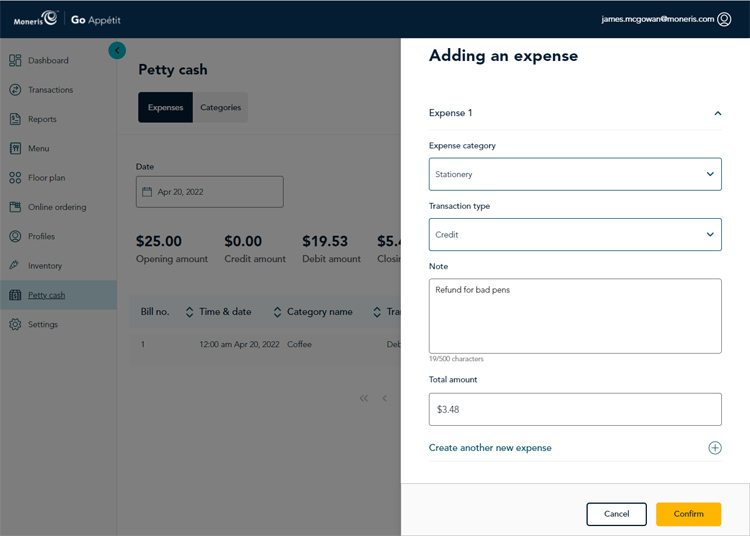
- Click the Confirm button at the bottom of the side panel. The transaction is recorded and the Petty cash screen appears with the expense listed.
End the session
After your expenses have been recorded for the day, follow the instructions below to end the petty cash session.
- On the portal’s main menu, click Petty cash.
- In the Petty cash screen, click the Stop session button. A confirmation popup appears.
- Click the Confirm button. The session steps and the Petty cash screen reappears.


