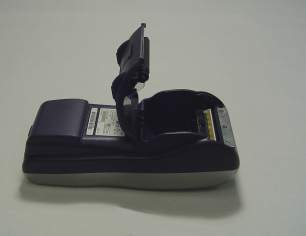
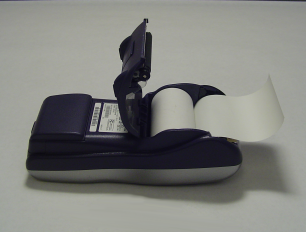
Paper well open and empty Paper well open with roll of paper
To load a paper roll into the terminal:
Open the paper well at the
back of the terminalt of the base (look for the ![]() icon).
icon).
Press the printer latch towards the back of the printer then lift the printer lid up and back.
Remove the paper roll that is in the paper well.
Prepare the new paper roll: Loosen the glued leading edge of paper and unwind the paper roll past any glue residue on the paper, or remove the protective strip.
Place the new paper roll into the paper well with the loose end unrolling from the bottom of the roll towards the top of the terminal.
Pull the loose end of the paper towards the topof the terminal at least one inch (2.2 cm) past the metal teeth at the front of the paper well. Make sure any glue residue on the paper role is past the cutting teeth of the printer.
Close the printer lid and press firmly on it to ensure that it is securely latched.
Tear off the loose end of the paper by pulling it towards the keypad then sideways across the metal teeth.
Select DEBIT & CREDIT and then press the 3 key to feed paper through the printer and ensure it is working properly.
Press the * (asterisk) key to return to the applications menu.
The printer is ready to print again.
Note: If the printer ran out of paper in the middle of a receipt or report, you may be able to reprint the receipt or report.
When stored, thermal receipt paper should not be exposed to:
Vinyl, plastics, adhesives, shrink-wraps, wet-toner copies or certain carbon papers
Office light, UV light
High humidity (above 65% relative humidity)
Temperatures above 25 degrees Celsius (77 degrees Fahrenheit)
Try to keep the paper in a dark, dry, climate-controlled place.